This might be my favorite project I’ve made to date. I saw an incredible flower headpiece photo online and knew I wanted to make something inspired by it for an office St. Patrick’s Day lunch. We were supposed to wear our most outrageous outfits. I wasn’t feeling outrageous, but I was feeling big—as in a big hat. Haha.
Making the Hat Base
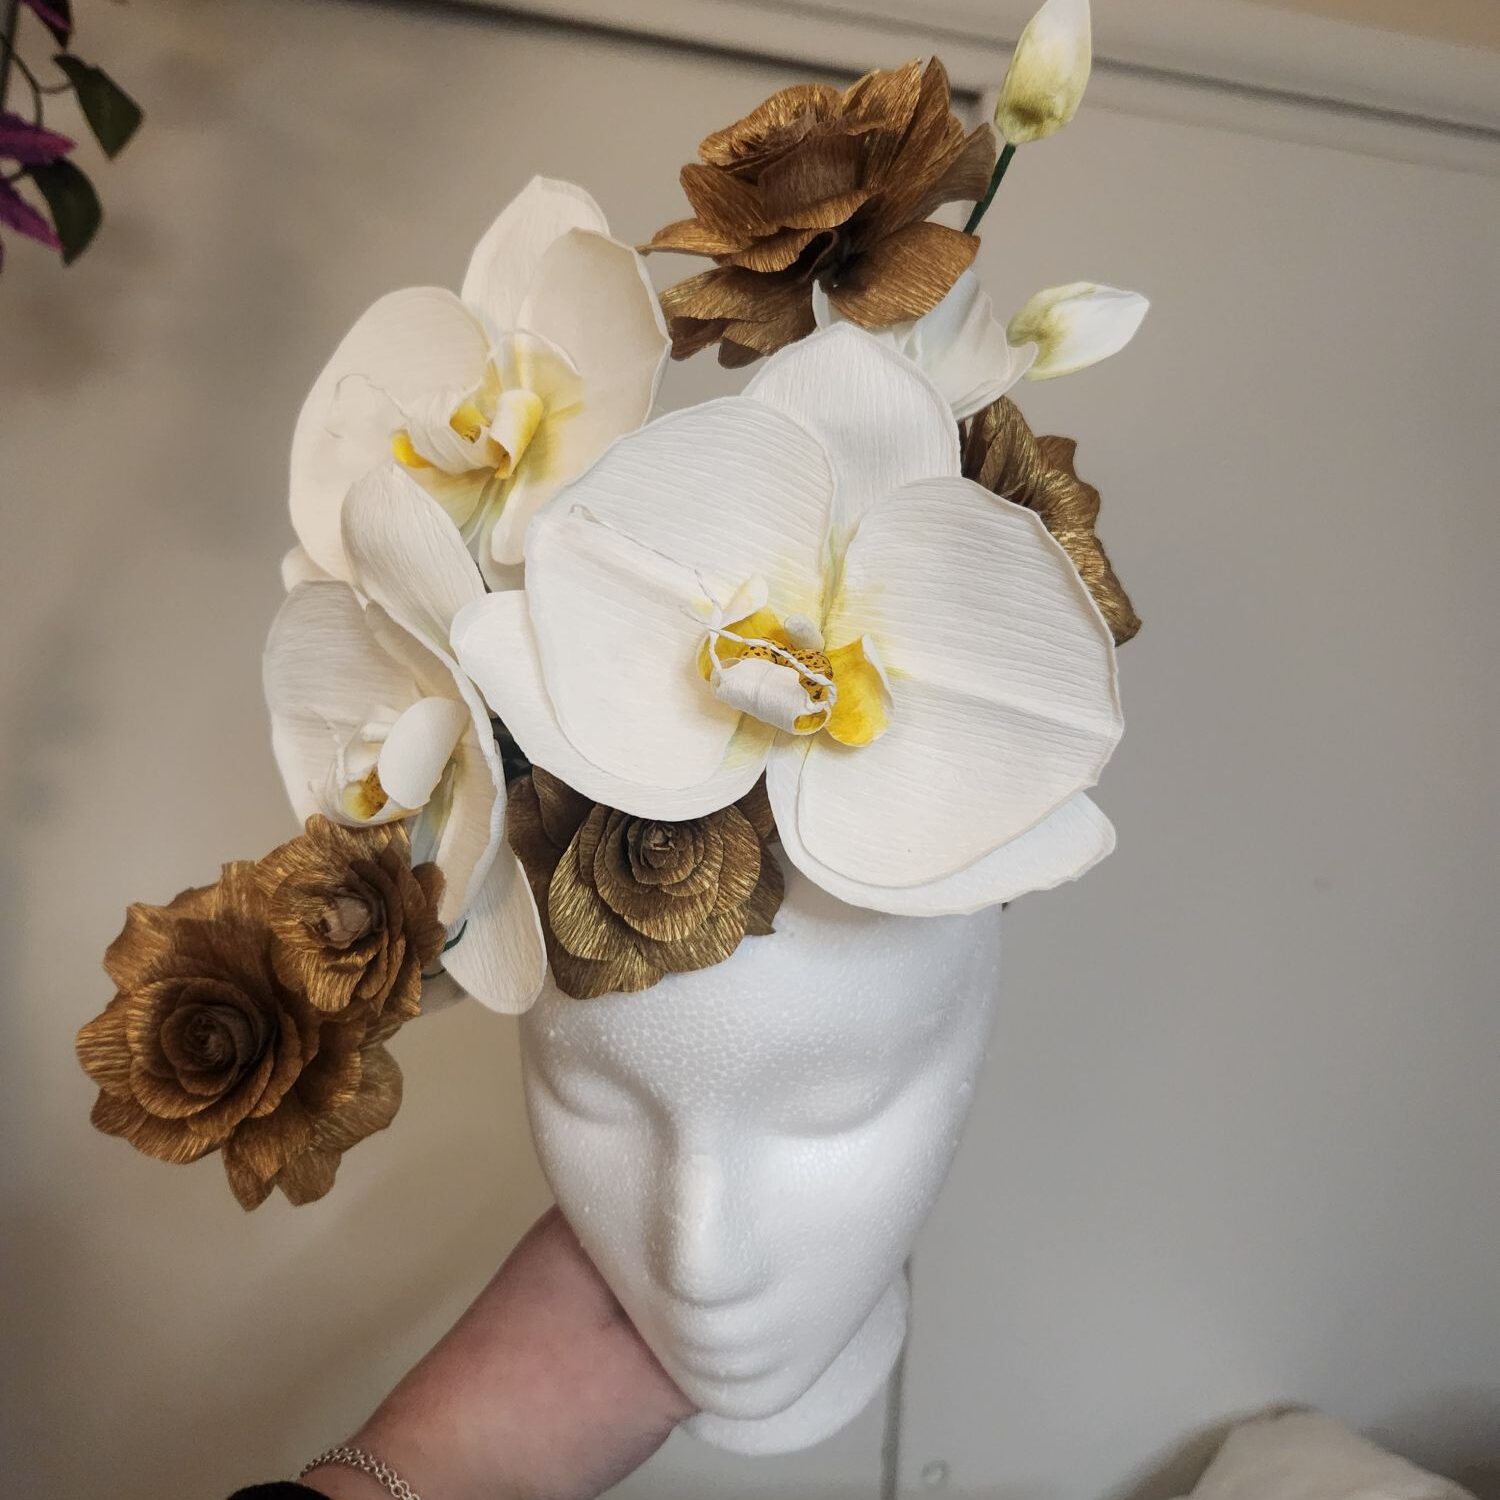
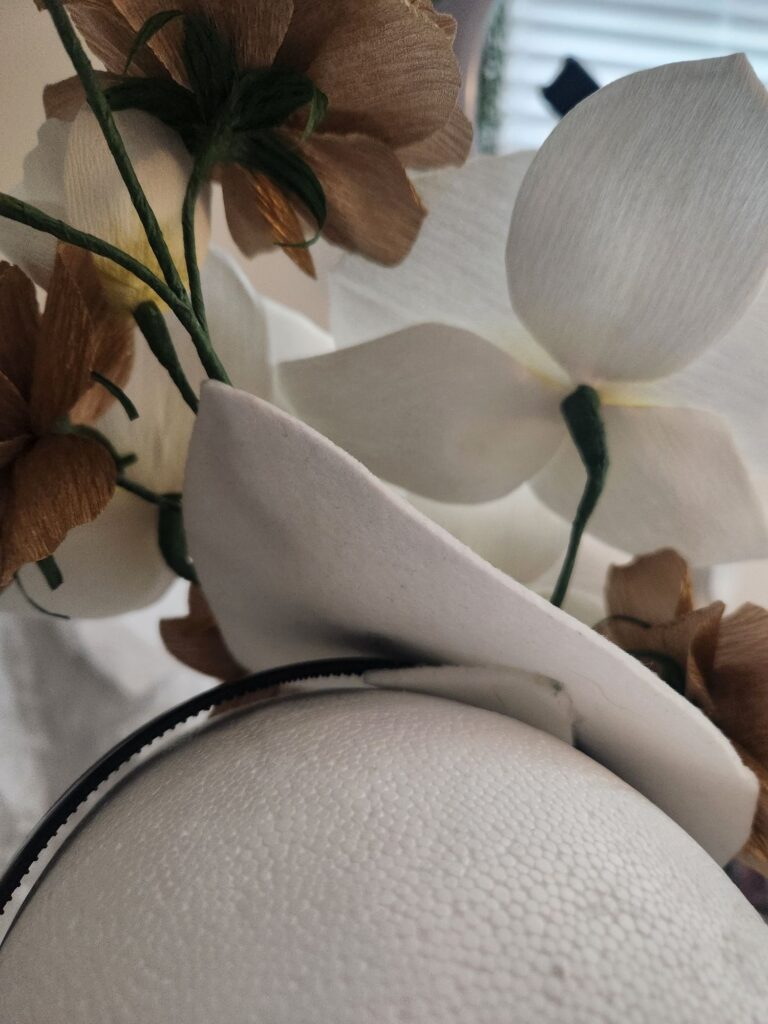
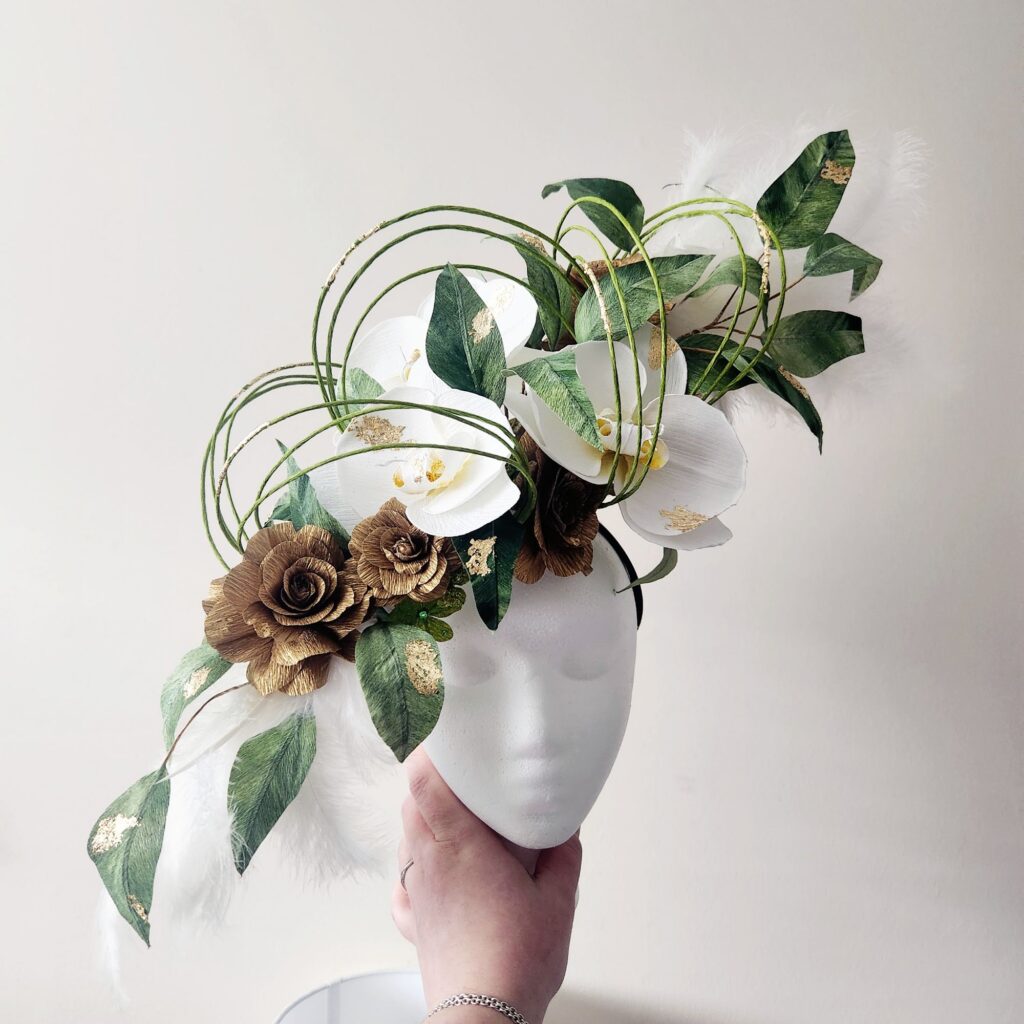
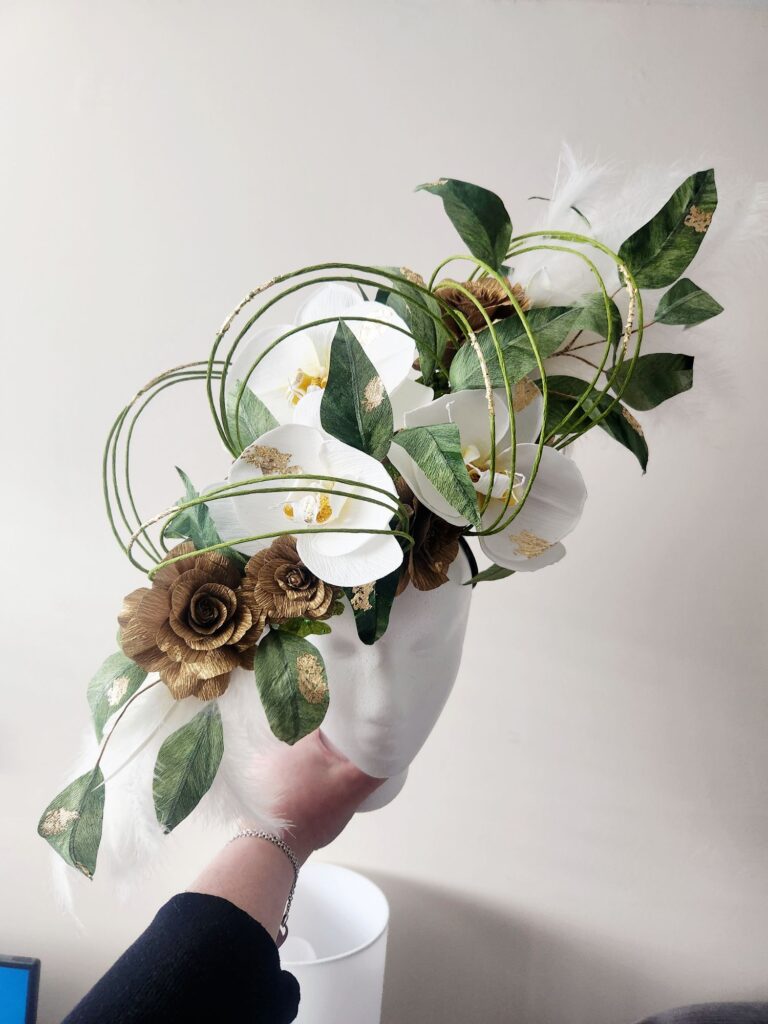
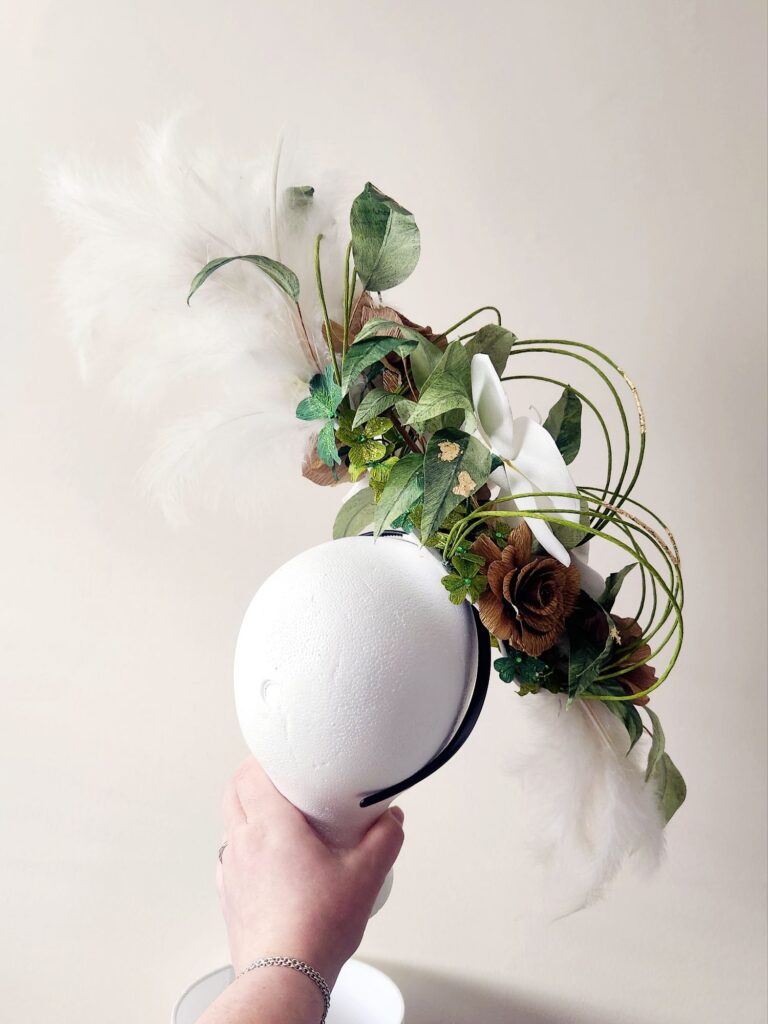
I had made a small fascinator a few years ago. It’s a small, cute pink and white one. But this needed to be big. Statement making. Over the top, perhaps? lol. I wanted it to angle over my eye and go up in the back. So I needed to figure out how to make that happen. I found some tutorials online and realized that I needed fabric stiffener. I drew up a rounded diamond-ish shape I liked and then soaked it in stiffener, shaped it, and left it overnight to dry. Surprisingly it worked! I then added a “loop” underneath so a headband can slip through and hold the hat in place. It mostly worked. It ended up being a little heavy for the style of headband I wore.


Creating the Flowers
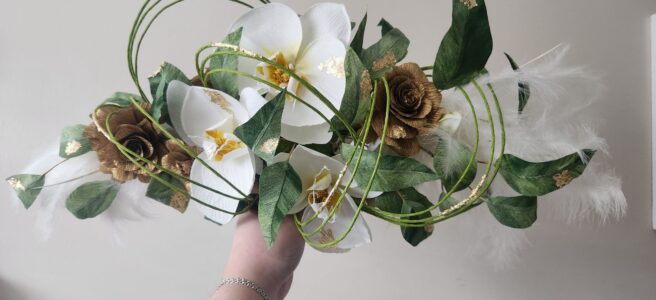
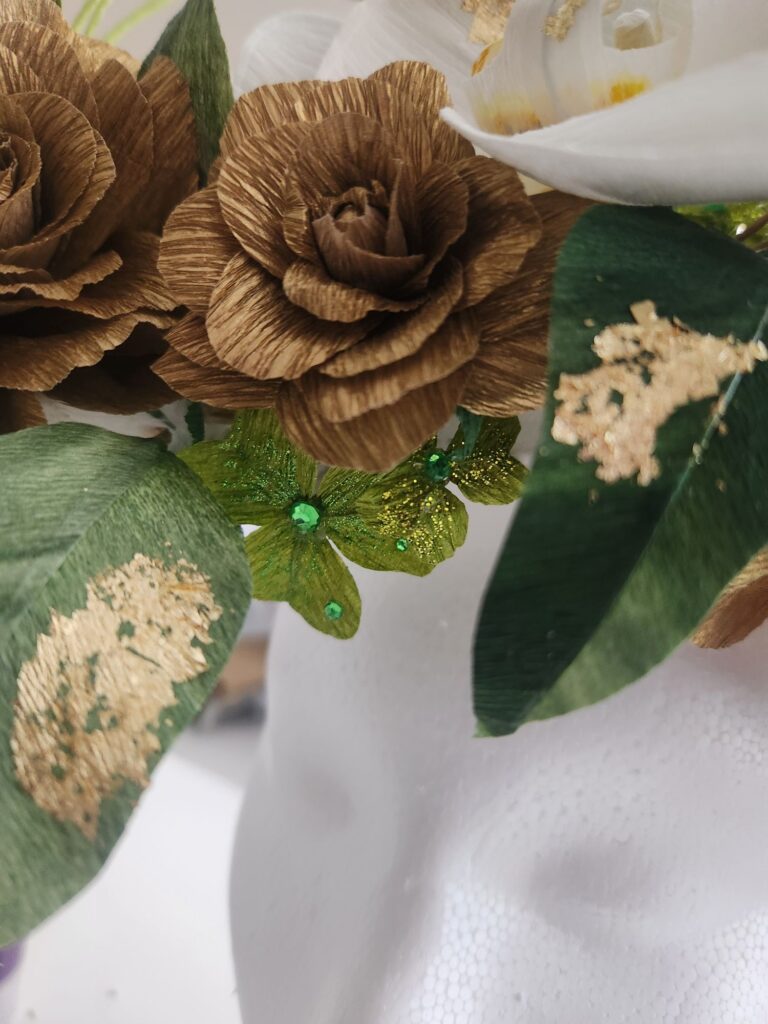
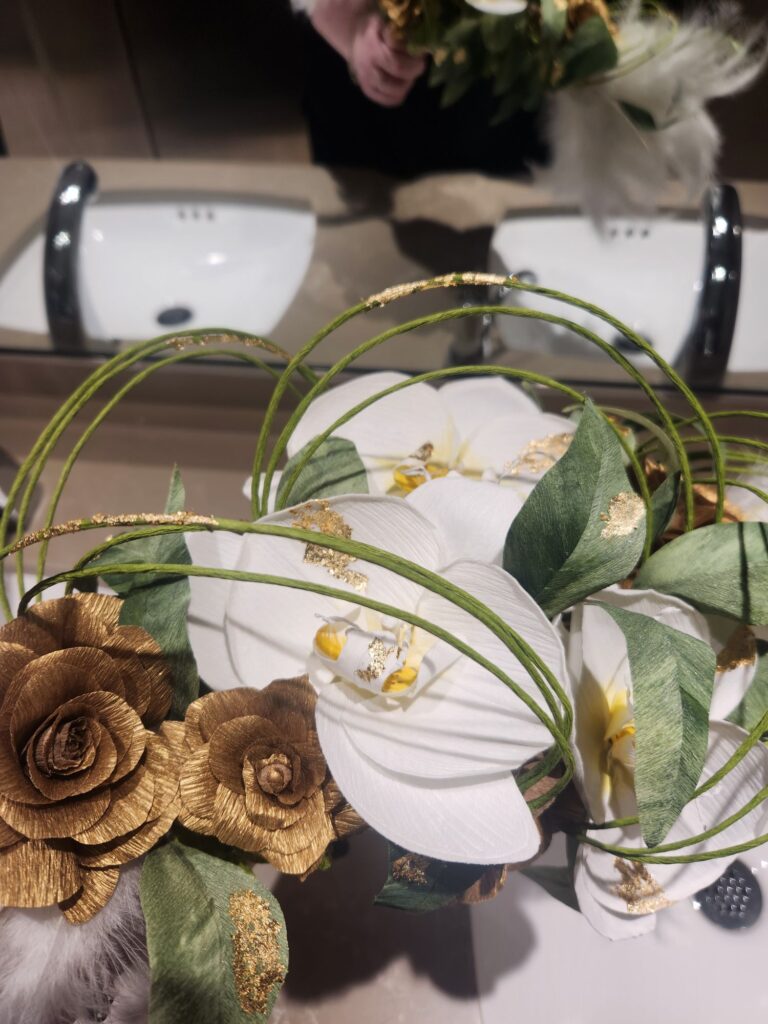
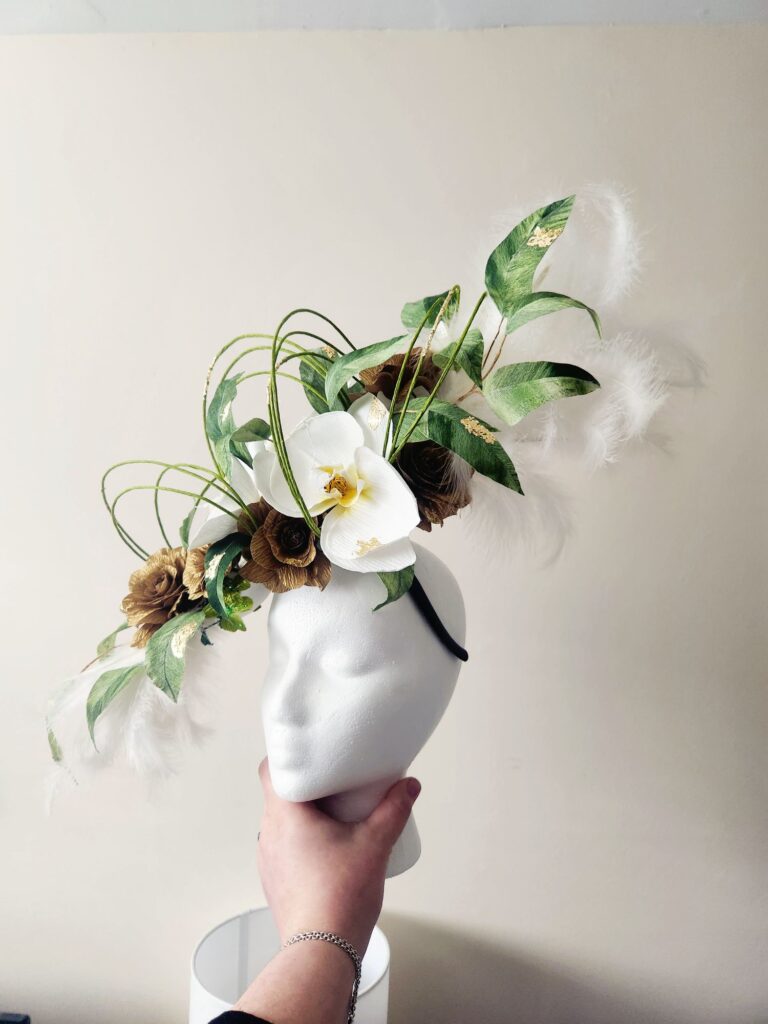
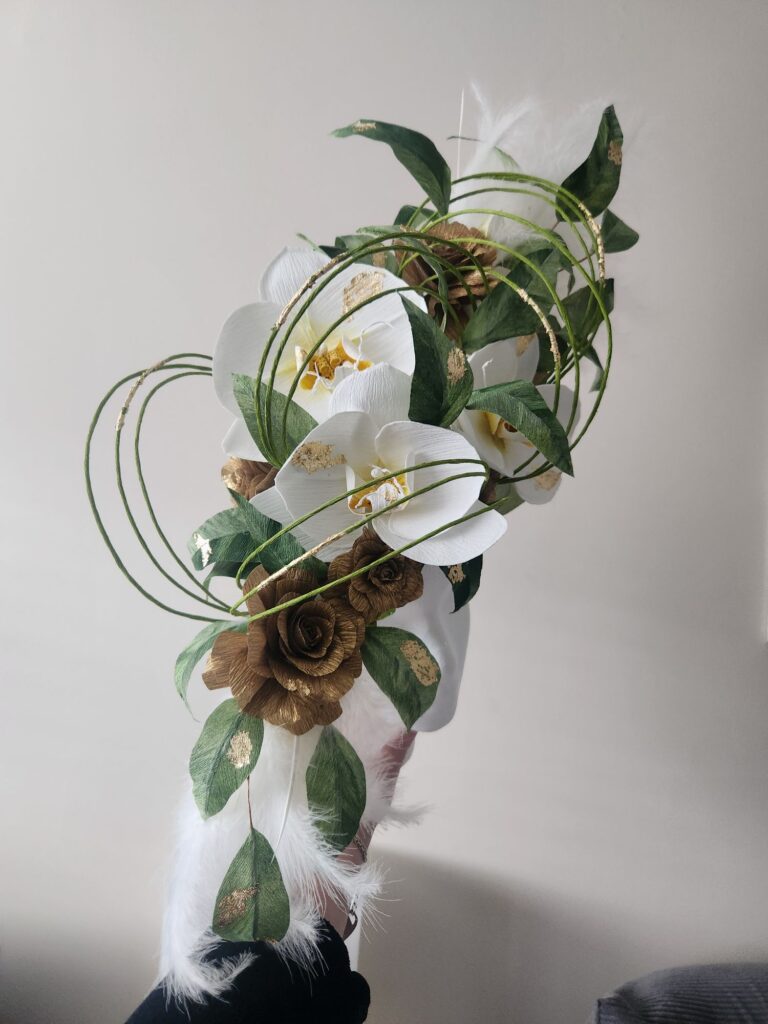
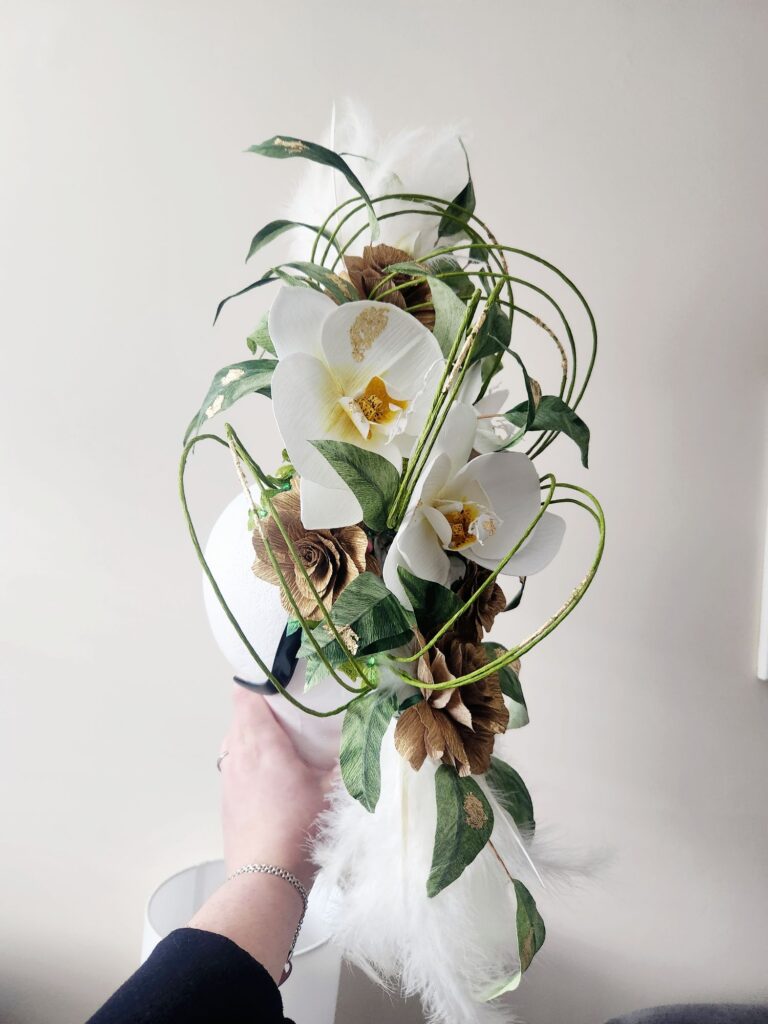
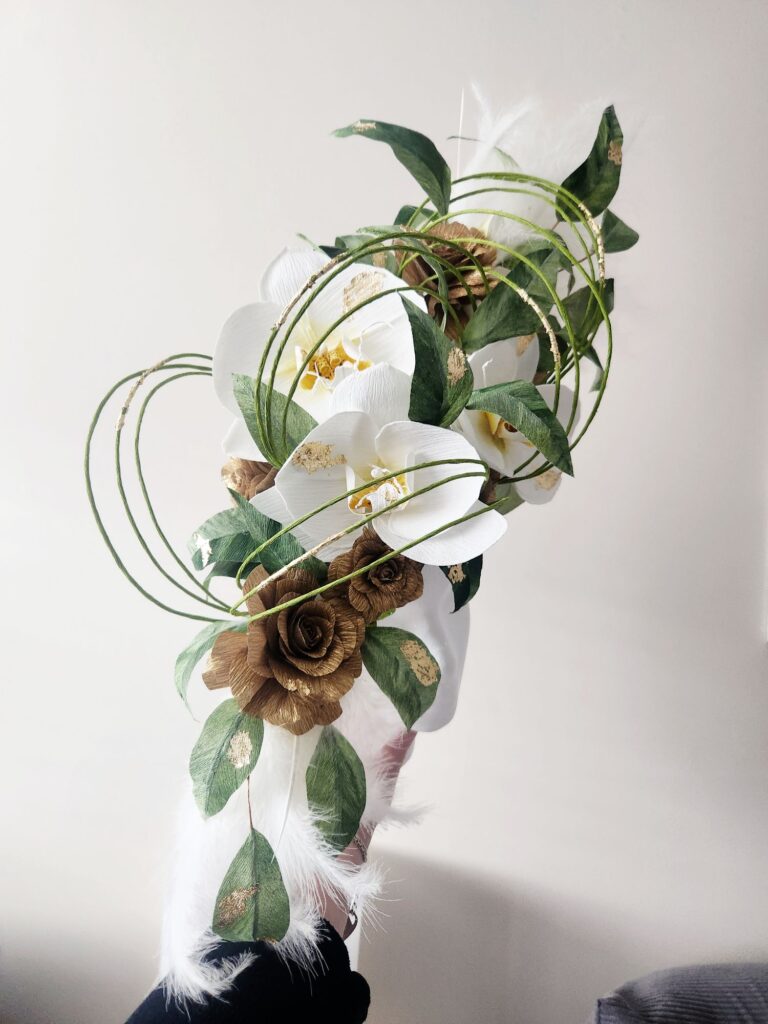
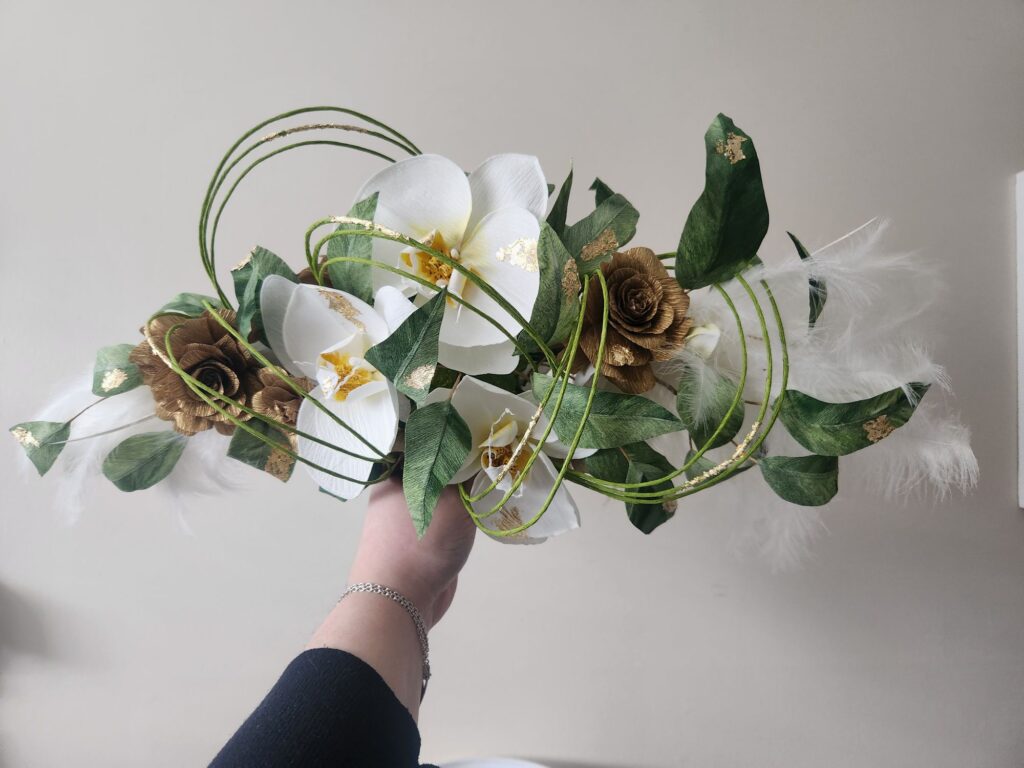
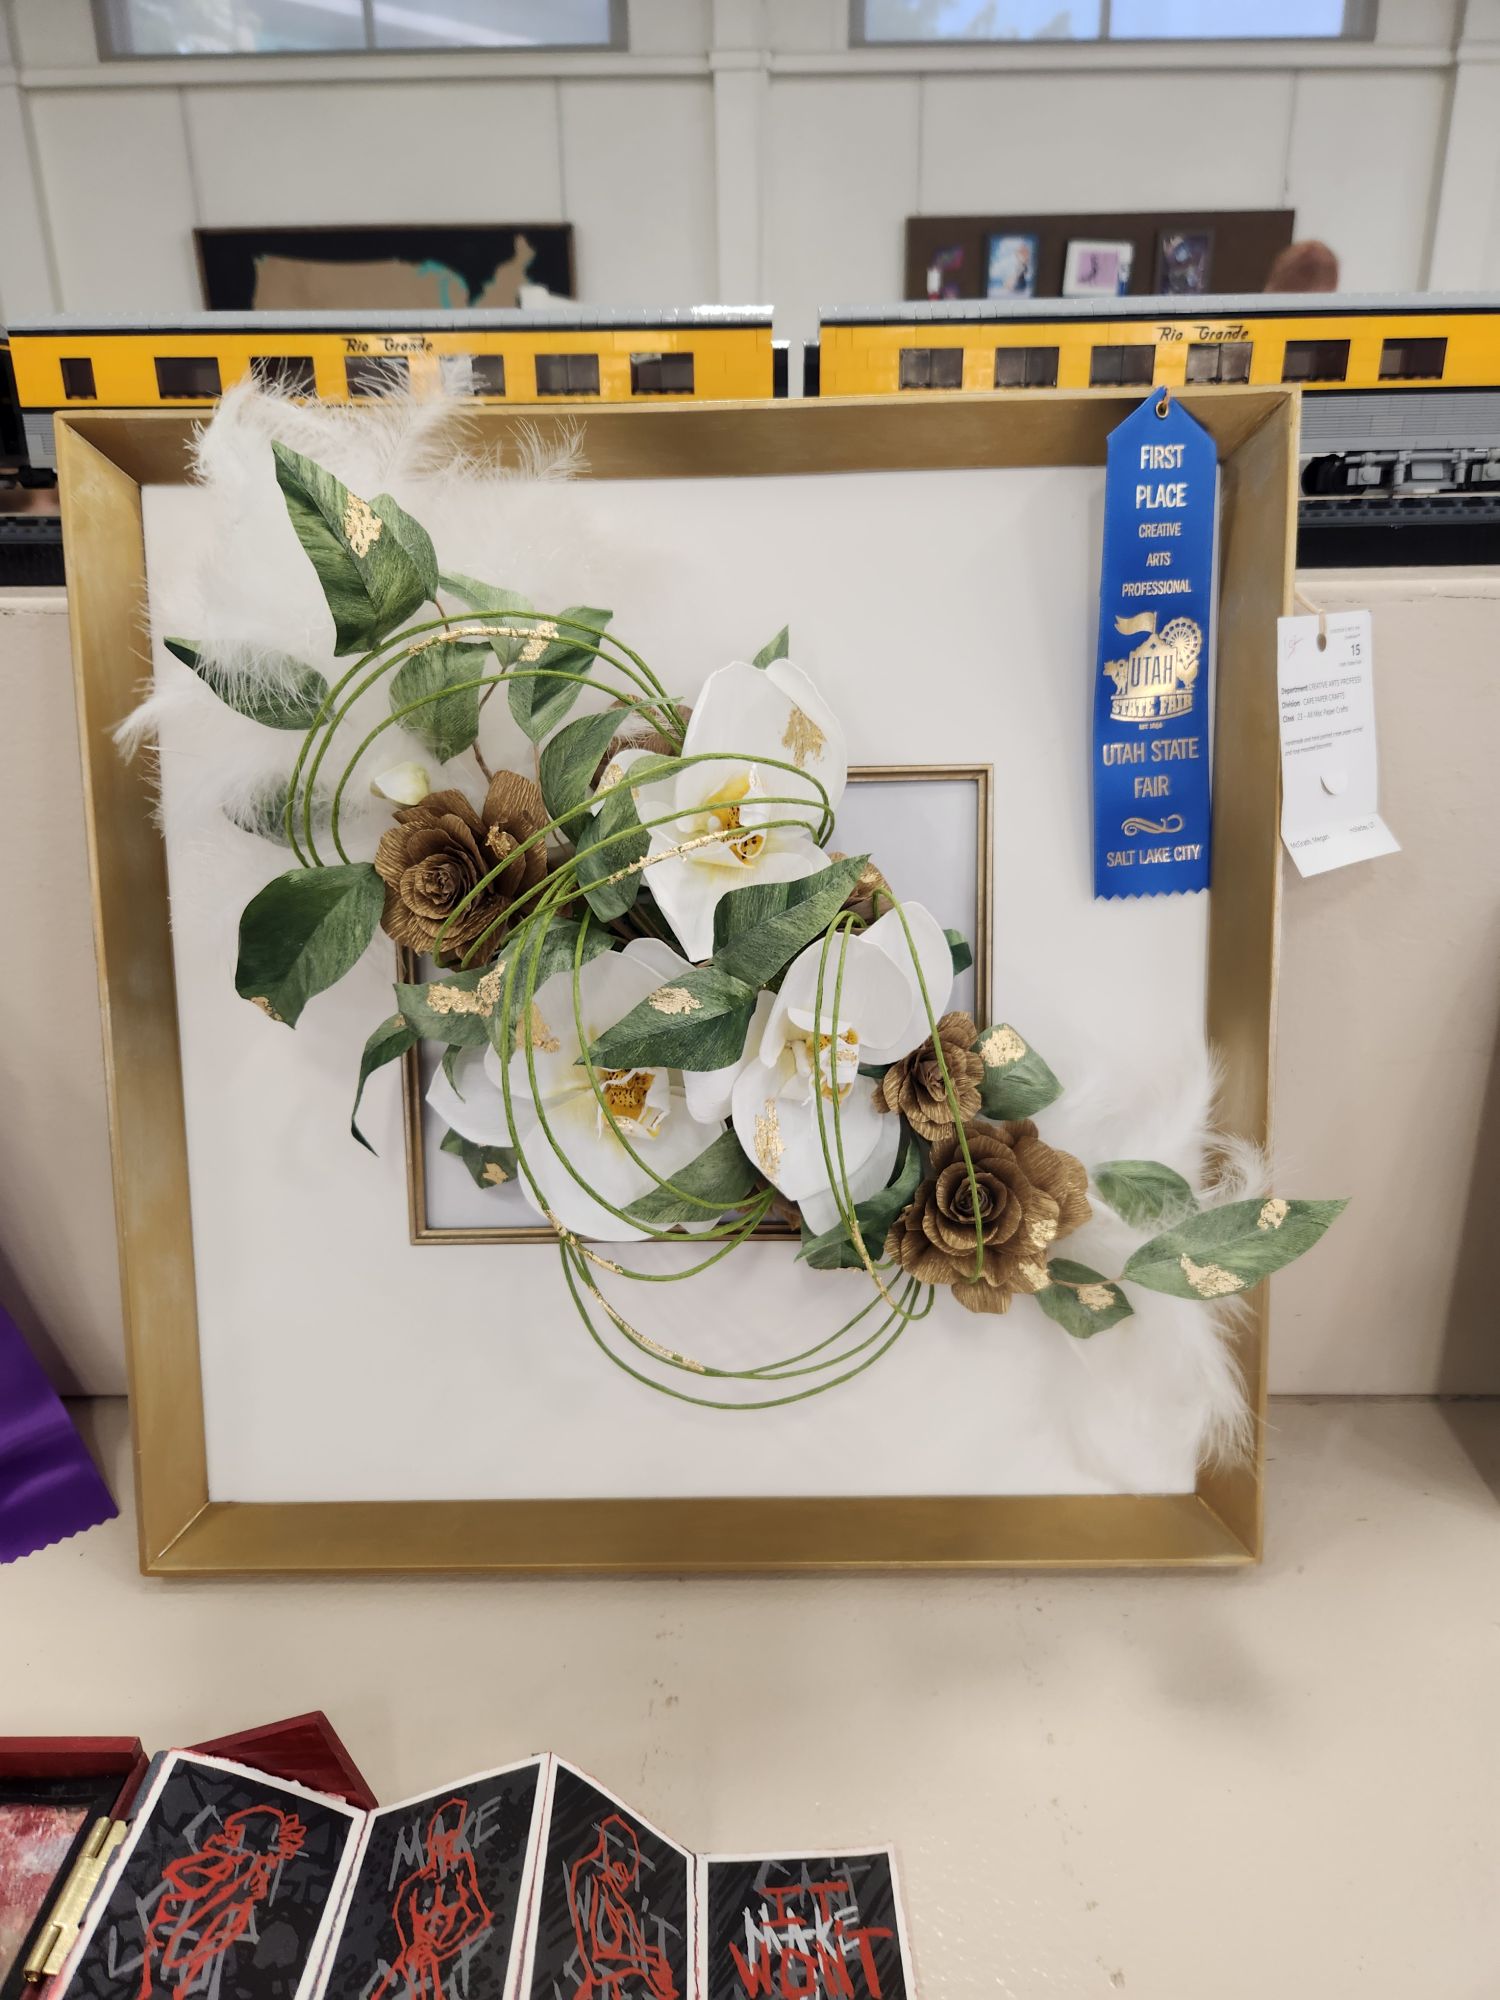
Then I got to work on flowers. I loved the huge orchids on the inspo photo so I made three big ones, with some flower buds up at the top so it looked more like a branch. I used the branch as the basic armature of the hat. There needed to be some accent flowers. Since this was for a St. Patrick’s Day party, I went with seven gold roses.
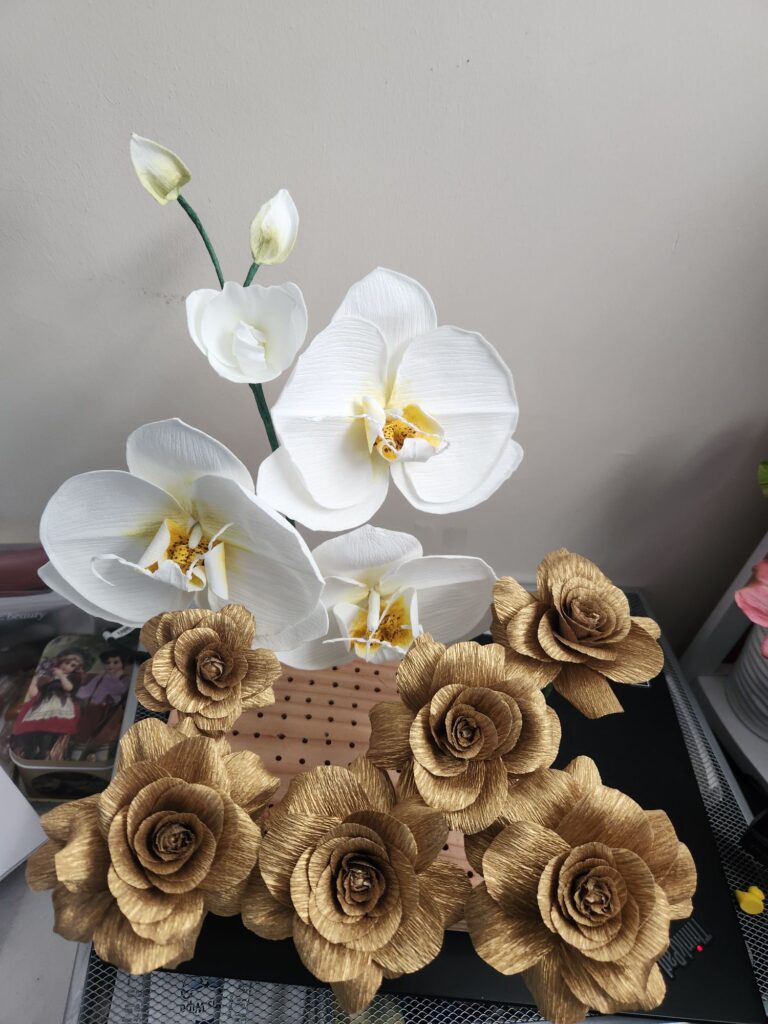
The full-sized orchids are about six inches across—they are big! The biggest rose is about five inches and gets progressively smaller.
Making the Leaves
Once I had the roses added, I knew I needed some greenery. Maybe lots of greenery?
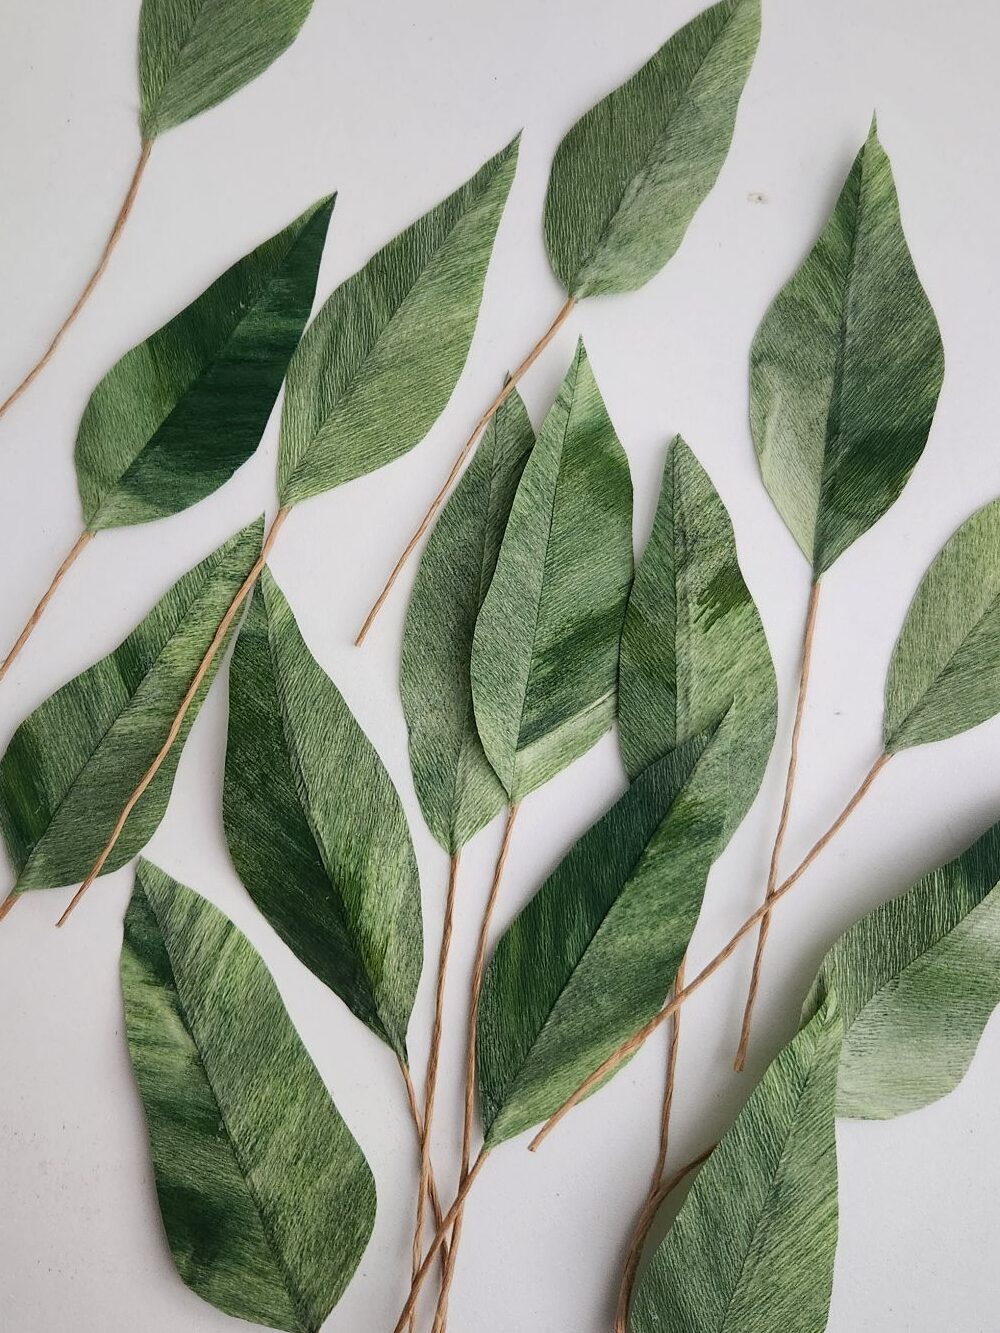
Green crepe has a bad habit of fading and bleaching out in the sun, so I was hesitant to use it for this project, because I wanted it to have longevity. There are sprays that can be used to help with color fixing, but they are not permanent. One way to help combat this is to paint or dye your own crepe. I chose to do this for my green. I’ve painted green crepe for my rose leaves before. This time, I wanted to try dyeing white crepe green. I picked up acrylic ink in a variety of blues, yellows, and greens (even a silvery green, which gave the leaves a cool, subtle shimmer). If you are looking for these paints, I suggest looking at Michaels and when they are on sale or if you have a coupon.
I decided on a leaf shape roughly similar to a blue gum eucalyptus (my favorite!) and cut my white crepe paper into strips that would be that leaf length. I mixed the paint with water and put the paper strips in to absorb the color. Then, I went back over the paper with additional drops of paint as it was drying but still damp to get more color variation. I LOVE HOW IT TURNED OUT. I will definitely be doing this method again. The color was amazing.

Adding the Greenery
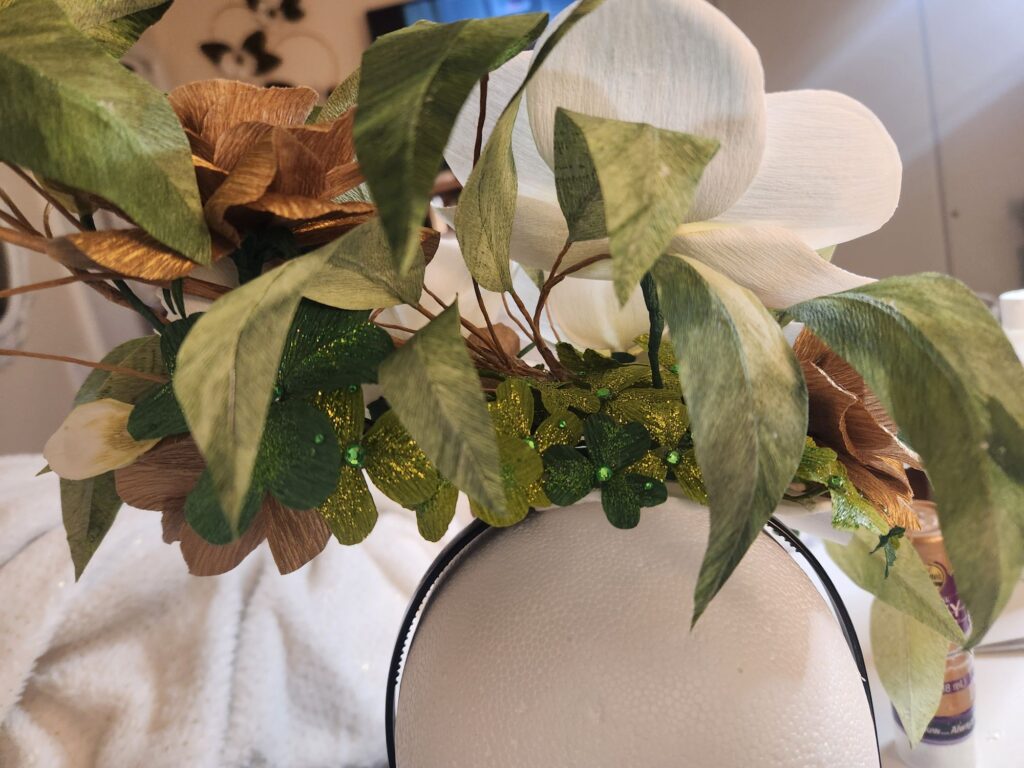
I glued the leaves individually to the armature so I could place and shape them where I wanted. The nice thing about having wired leaves (and petals, if the flower calls for it) is that you can shape the leaf and have it go wherever you like. It was fun to have the leaves curl, bend, and weave throughout this project.
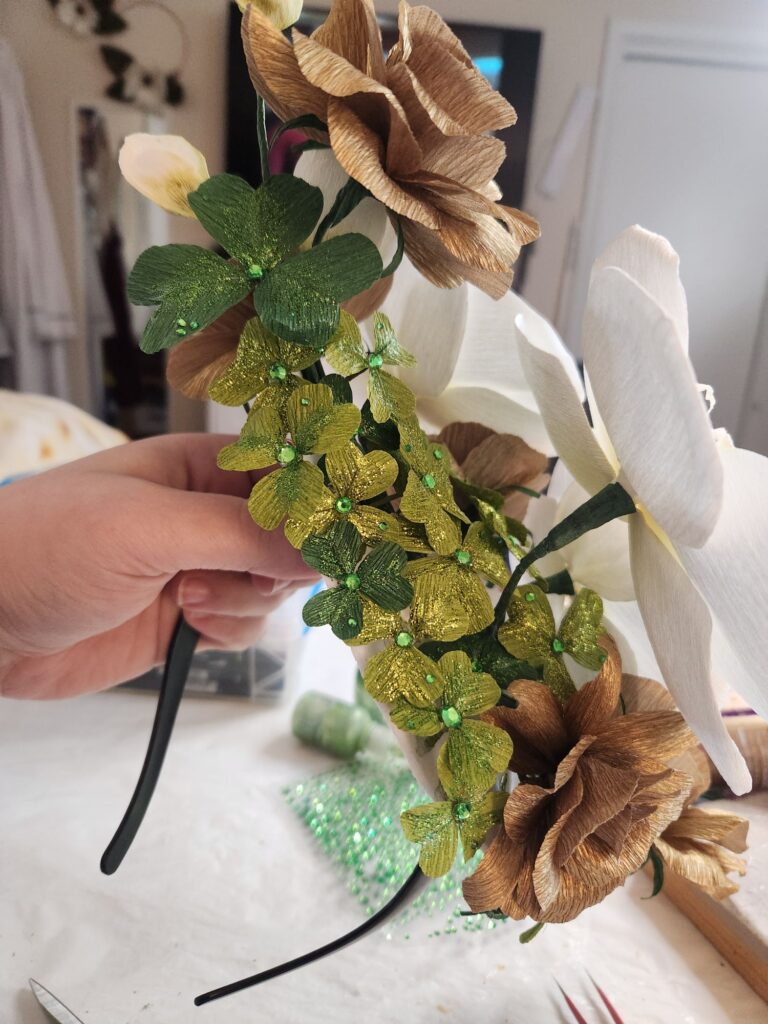
I needed “ground cover” in a blank spot in the back, so since it was St. Patrick’s Day, I added tons of little clovers. I used the template I put together from my redwood sorrel (which isn’t related). There is a four-leaf clover in the clover patch. It’s hiding in the back a little, towards the bottom (not really visible in the photo below).
Finishing Touches
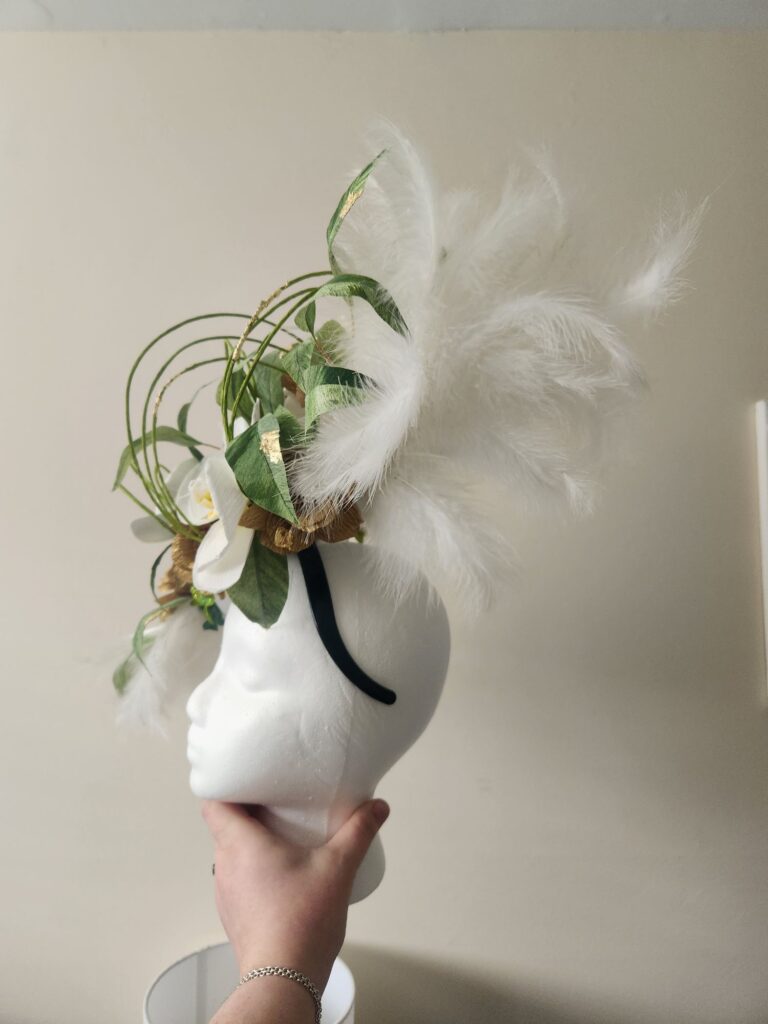
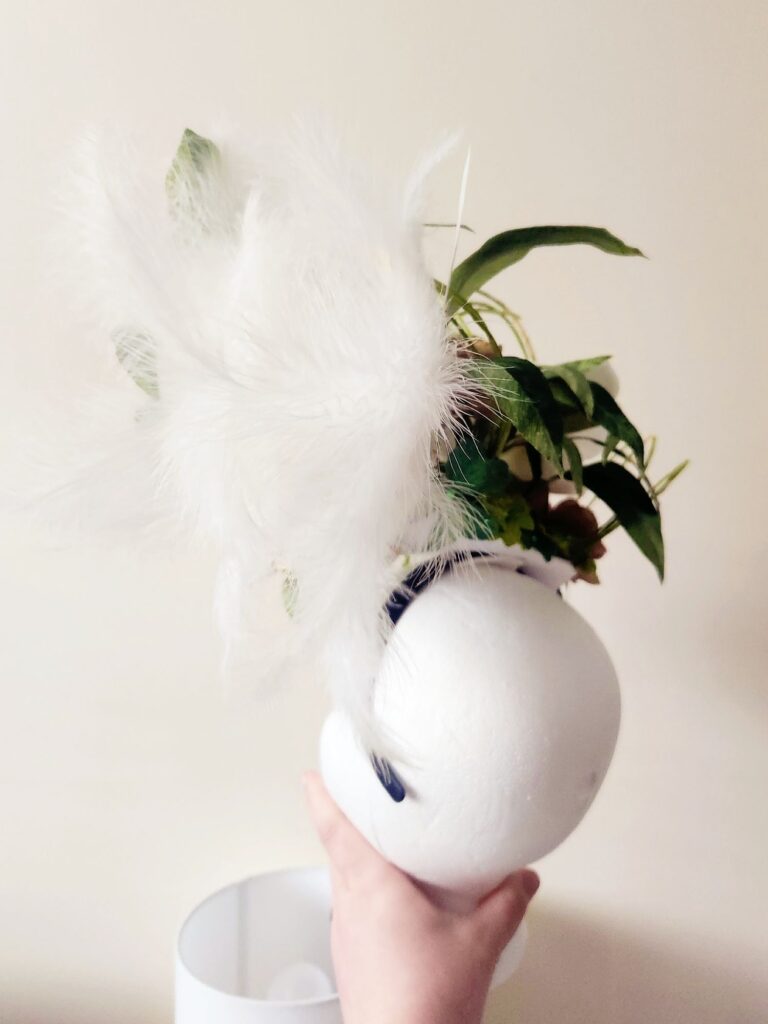
Next were the finishing touches. Adding the leaves, the green wire loops I’d made, and feathers I’d picked up at a local craft store.

The wire loops were 20 gauge wire wrapped in green crepe paper. I made 15 lengths and grouped them into five groups of three. Then, I wove them in and out of the flowers and leaves.
I found an ostrich feather “branch” at a craft store and loved it so much I just had to incorporate it. There are two sections at the top and one at the bottom. With these added, the hat is 24 inches long! I did make them removable. lol.
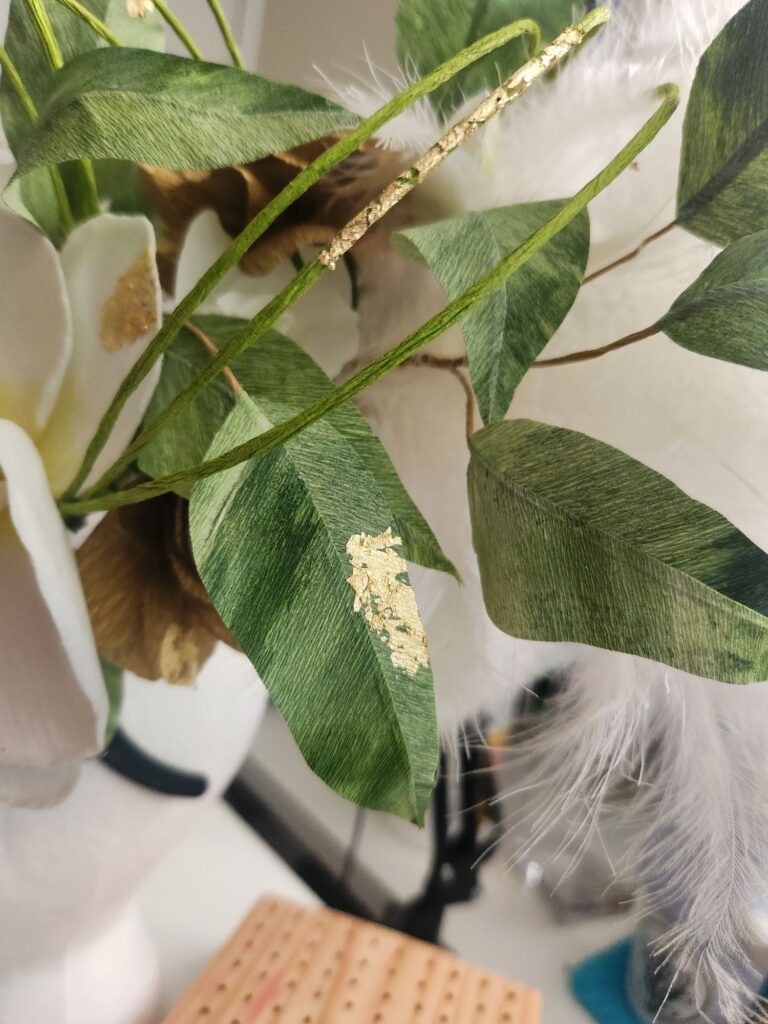
It needed something else. Some pièce de résistance. I had already added a touch of glitter in the back and didn’t want to add more. But gold leaf? YES. I added patches of it in random spots all over. I loved how it turned out.

Finale
If you’ve made it this far, bravo! Let’s see how it turned out!
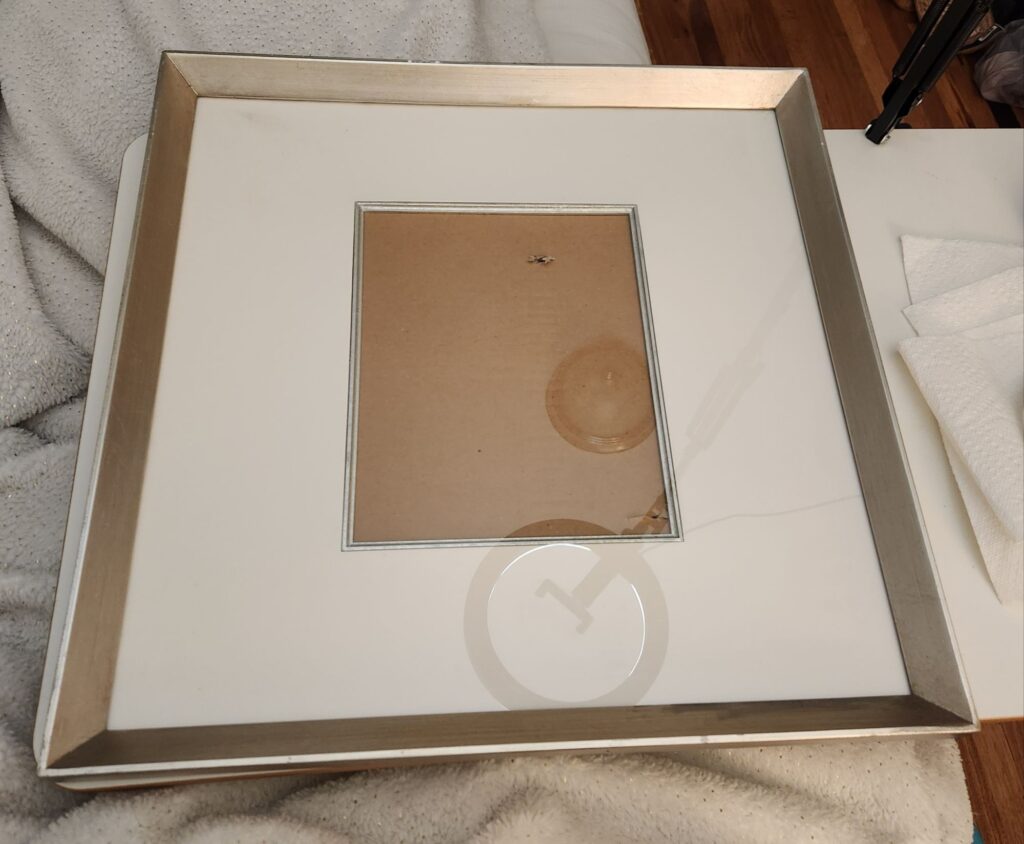
After it was a hit at the party (if I do say so myself, lol), I needed a way to store it safely. I found a large frame at a thrift store and thought it was perfect for mounting the fascinator. I refinished the gold with some rub ‘n’ buff. Then, I mounted the hat on cardstock. I used zip ties to attach it to the frame so I could clip it out if I wanted to use the hat again. I’m pretty proud of how professional it ended up looking!
Mounted and framed Orchid and Rose Fascinator 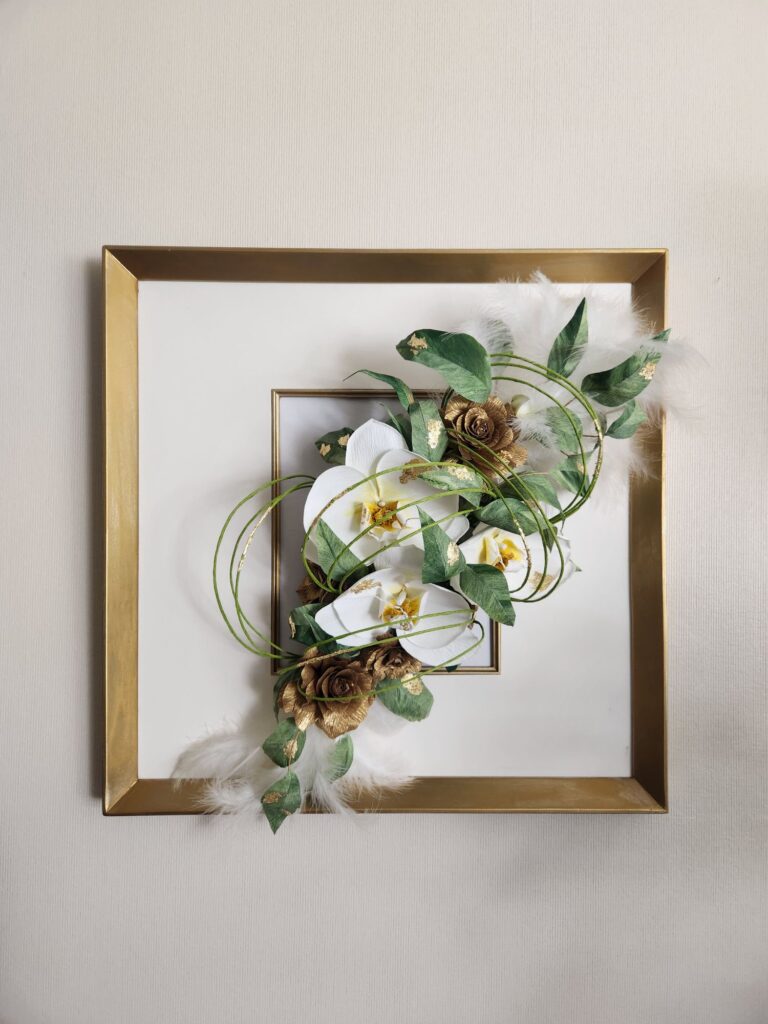
Mounted and framed Orchid and Rose Fascinator 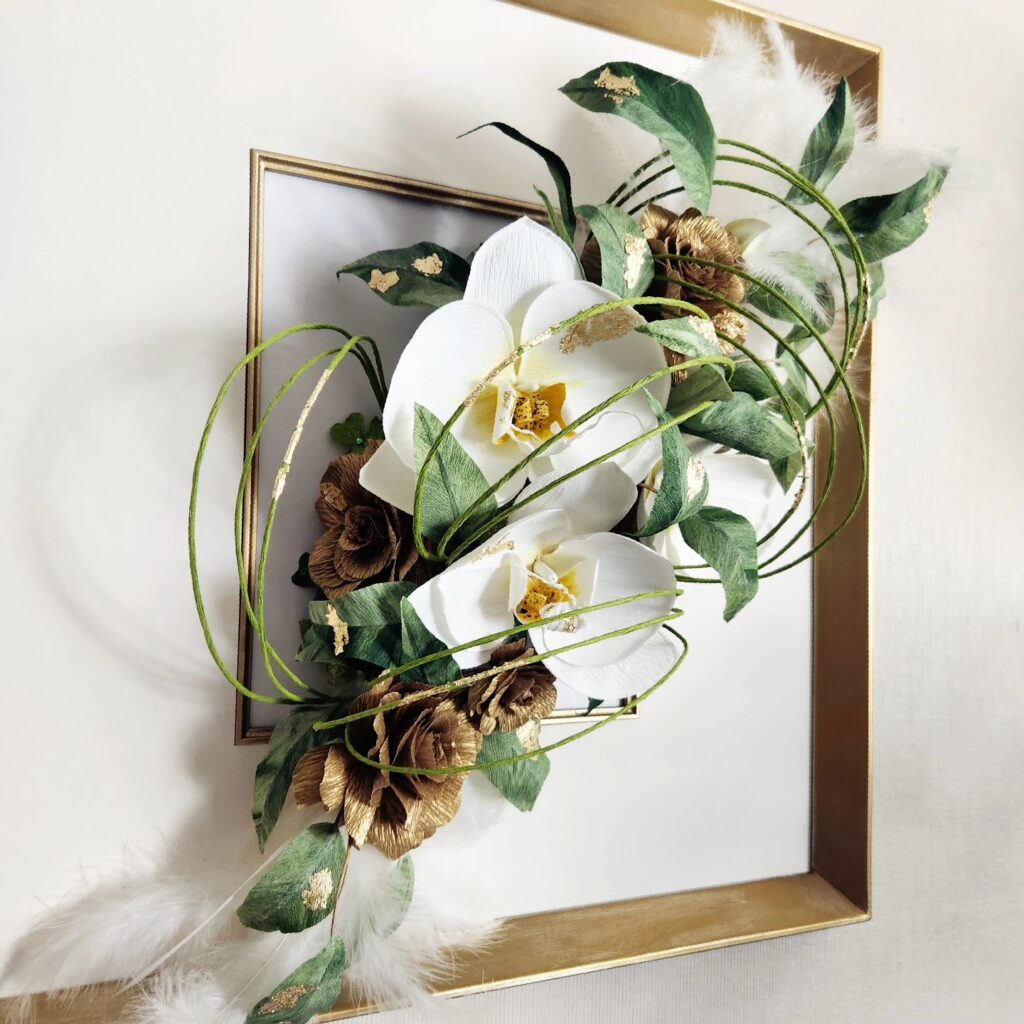
Mounted and framed Orchid and Rose Fascinator 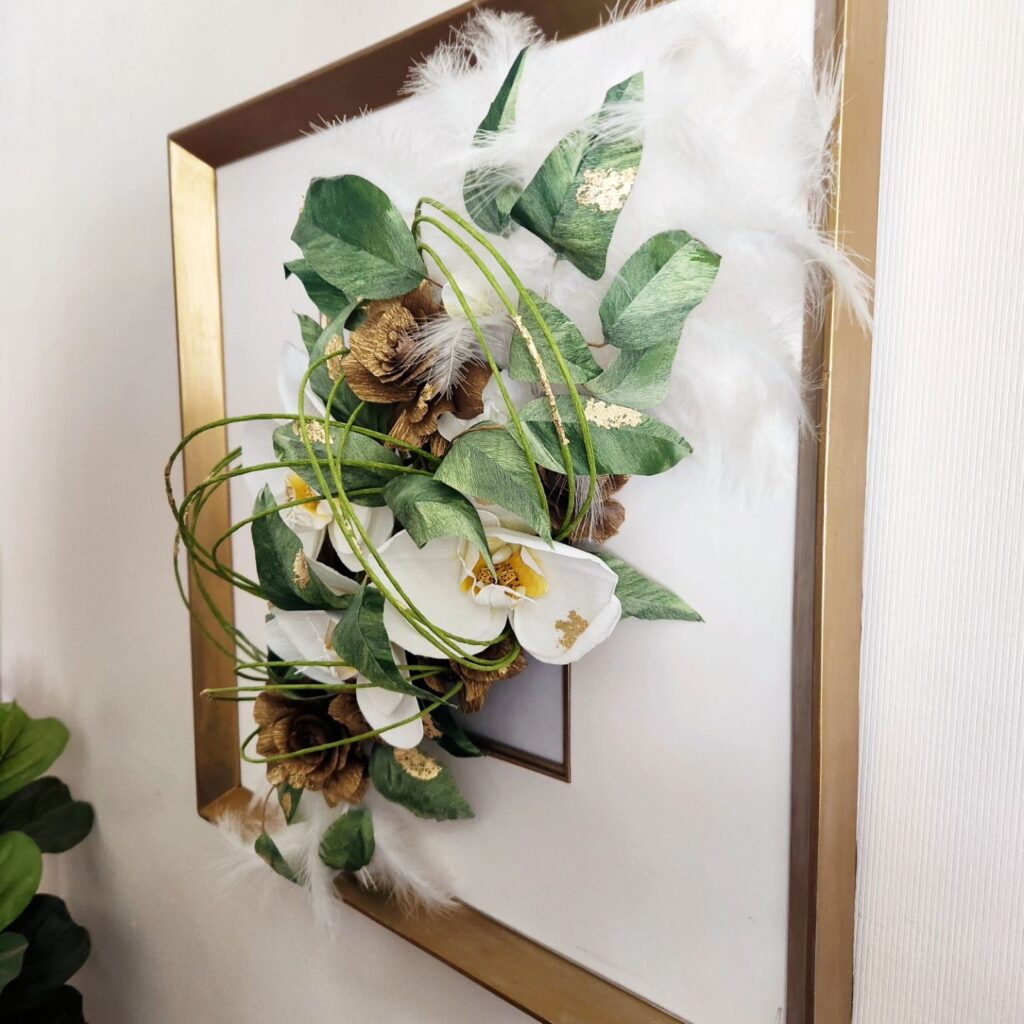
Mounted and framed Orchid and Rose Fascinator 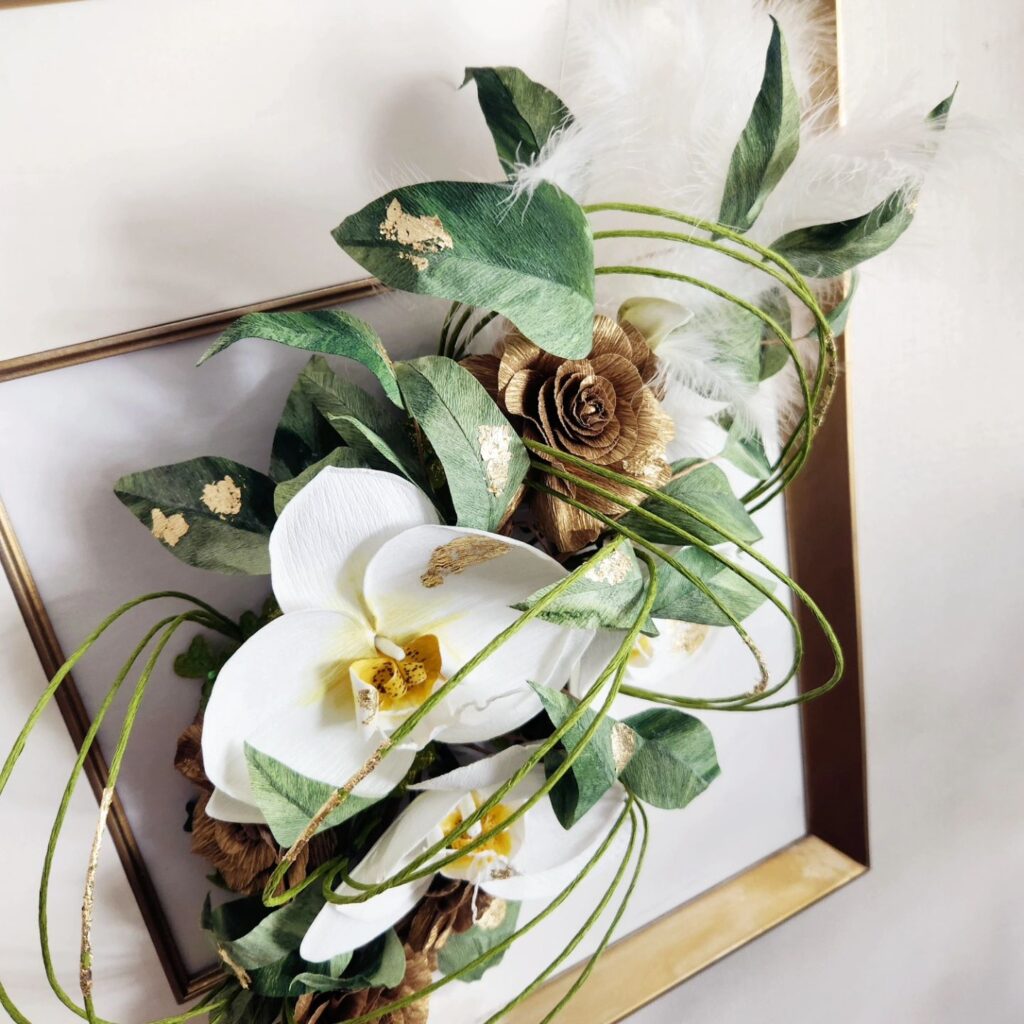
Mounted and framed Orchid and Rose Fascinator 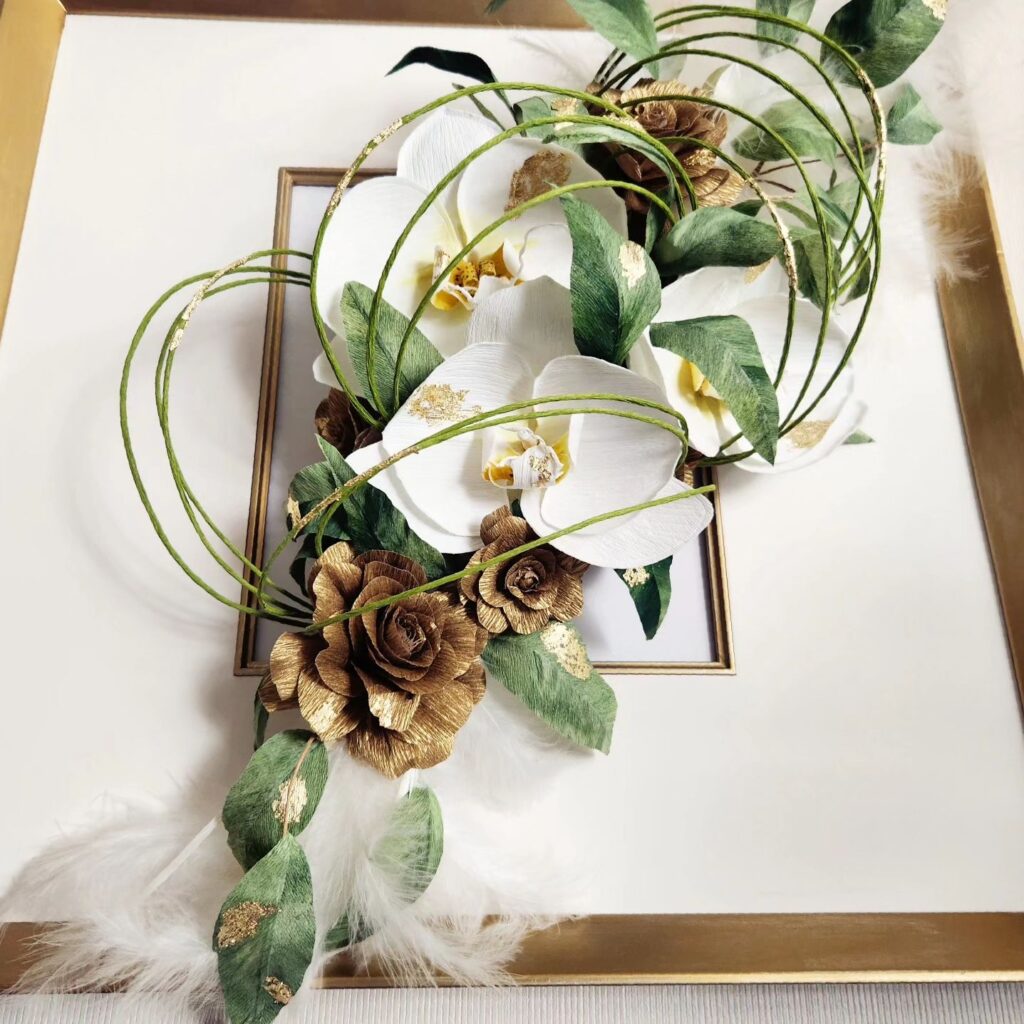
Mounted and framed Orchid and Rose Fascinator 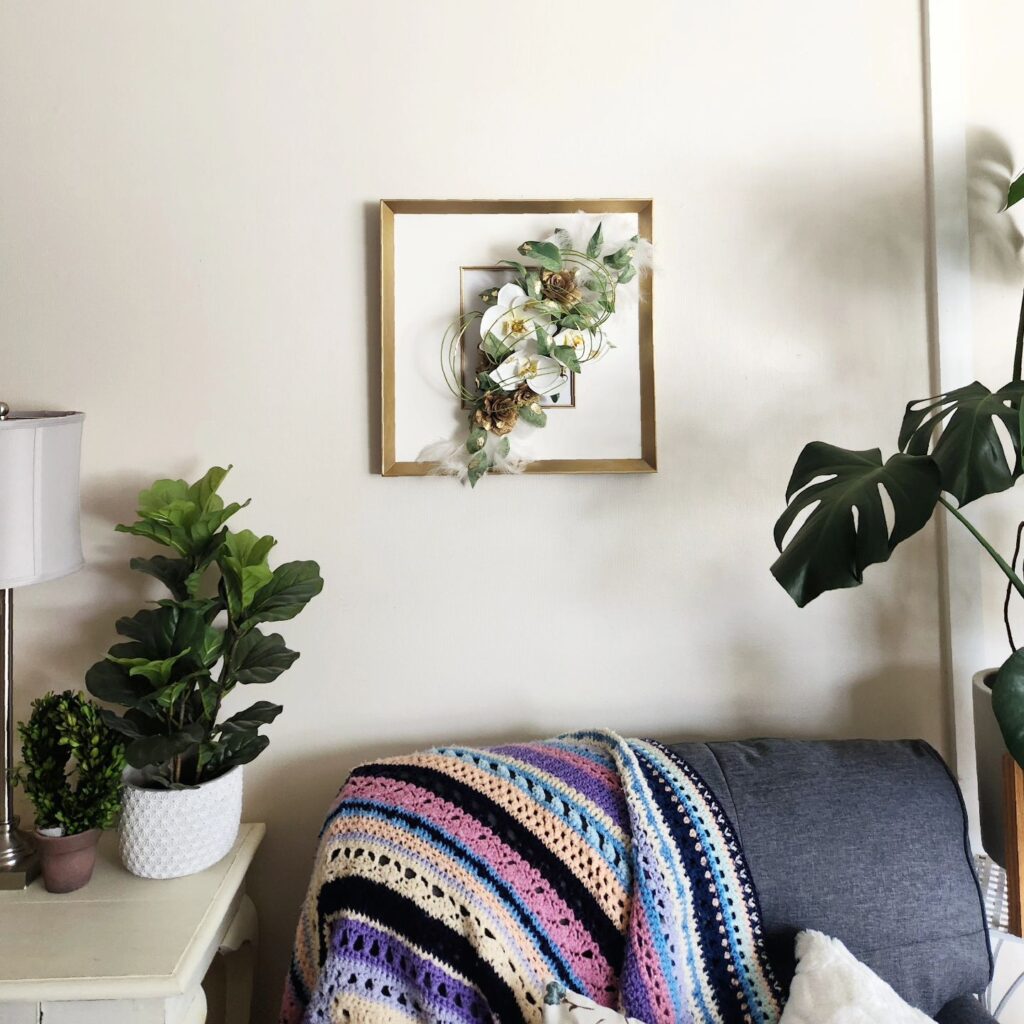
Mounted and framed Orchid and Rose Fascinator 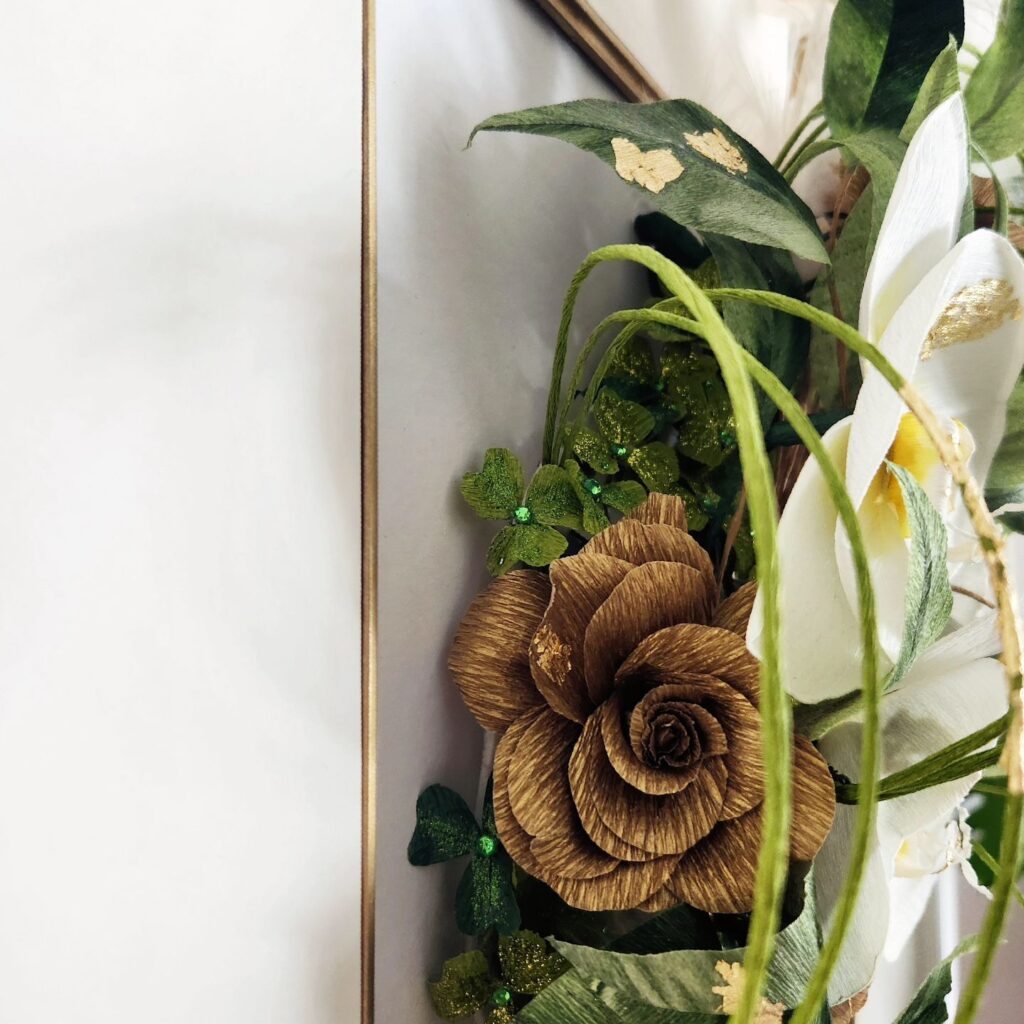
Mounted and framed Orchid and Rose Fascinator 
Mounted and framed Orchid and Rose Fascinator 
Mounted and framed Orchid and Rose Fascinator
To wrap up this post, I entered it at the State Fair this year and got a First Place Ribbon!
Thanks for reading!
xoxo!
I am so impressed!! Looks like a wedding bouquet on the head. Congrats on the award from the fair. Love, Nadine
Thank you! It was such a fun project!